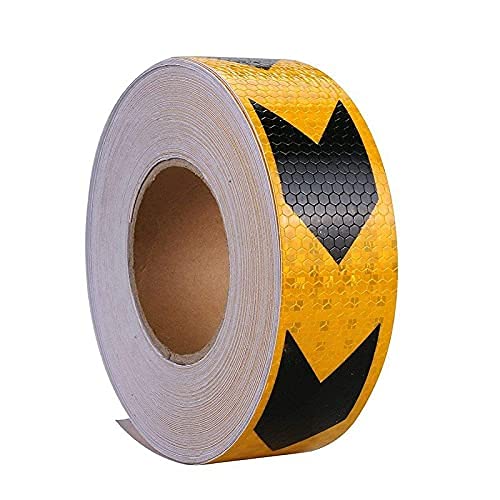
Reflective tape is one of the simplest and most effective ways to improve the visibility of your vehicle during nighttime, fog, rain, and other low-light conditions. However, the performance of reflective tape depends not only on its quality but also on how it is installed. Even premium-grade reflective tape may fail to adhere properly if the installation process is not followed correctly.
Tools and Materials Required
- High-quality reflective tape
- Measuring tape or ruler
- Masking tape
- Microfiber cloth
- Mild car shampoo or detergent
- Isopropyl Alcohol (IPA) or a suitable surface cleaner
- Plastic squeegee or a soft cloth
- Scissors or a sharp utility knife
- Hair dryer or heat gun (optional for curved surfaces)
Step 1: Select the Right Location
Decide where you want to install the reflective tape. Common locations include front and rear bumpers, side doors, tailgate, truck or trailer body, motorcycle mudguards, bicycle frames, helmets and side panels.
Avoid applying tape over number plates, headlights or tail lamps, parking sensors, cameras, air vents and moving components.
Cleaning the surface thoroughly with IPA is the most important step before applying reflective tape
Step 2: Clean the Surface Thoroughly
This is the most important step in the entire installation process. Reflective tape is designed to bond directly with the vehicle's surface. Dust, grease, polish, wax, or moisture can prevent the adhesive from making proper contact.
- Wash the area using mild detergent or car shampoo
- Remove all dirt and road grime
- Dry the surface completely
- Wipe the area with Isopropyl Alcohol (IPA) to remove grease, wax, or polish residue
- Allow the surface to dry completely before applying the tape
Important: Never apply reflective tape to a dirty, oily, dusty, or wet surface. Doing so can reduce the adhesive strength and shorten the life of the tape.
Step 3: Measure Before You Apply
Many installation mistakes occur because the tape is applied without planning. Measure the area carefully and use masking tape to create straight guide lines. Taking a few minutes to align the tape beforehand will ensure a professional-looking finish.
Step 4: Cut the Tape
Cut the required length using scissors or a sharp knife. Ensure the edges are neat and straight for a clean appearance.
Step 5: Peel the Backing Slowly
Peel back only a small section of the release liner initially. Avoid touching the adhesive with your fingers, as natural skin oils can affect its bonding performance.
Step 6: Position Carefully Before Sticking
Align the tape with your guide marks before pressing it firmly onto the surface. Once satisfied with the alignment, stick one end gently, slowly remove the remaining backing paper, and smooth the tape as you continue applying it. Do not rush this process.
Use a squeegee to press the tape from centre outward to remove air bubbles
Step 7: Remove Air Bubbles
Using a plastic squeegee or a soft cloth, press the tape from the centre outward. This removes trapped air and ensures complete contact with the surface.
Step 8: Use Gentle Heat on Curved Surfaces
If applying tape on curves or corners, gently warm it with a hair dryer or heat gun set to a low temperature. The tape will become more flexible and conform better to the surface. Do not overheat the tape.
Step 9: Apply Firm Pressure
After installation, press firmly along the entire length of the tape. Pay special attention to the edges and corners to ensure they are securely bonded.
Step 10: Allow the Adhesive to Cure
- Avoid washing the vehicle for at least 24 hours
- Protect the tape from heavy rain and pressure washing during this period
- The adhesive continues to strengthen over the next 24 to 72 hours
Common Installation Mistakes to Avoid
Applying Tape on an Unclean Surface
Dust, grease, polish, or moisture prevents the adhesive from bonding properly. Always clean and dry the surface thoroughly before installation.
Applying One End First and Then Repositioning
This is the most common mistake. Reflective tape is designed for single-use application. Once removed after initial contact, the adhesive may collect dust and lose bonding strength. Always measure and align carefully before removing the backing paper.
Stretching the Tape During Installation
Do not pull or stretch the tape while applying it. Stretching may cause lifting around the edges over time.
Washing the Vehicle Too Soon
Allow the adhesive sufficient time to cure before exposing it to water.
Maintenance Tips
- Wash with mild soap and water only
- Avoid abrasive cleaners or solvents
- Inspect the tape periodically for damage
- Replace worn or damaged sections promptly
- Keep the reflective surface clean for maximum brightness
Shop Laps of Luxury® Products
Available with fast delivery across India on Amazon.in.
Shop Reflective Tapes on Amazon